
How to Make Samosa Dough
To make samosa dough using the example batch, combine 250 g (2 cups) plain (all-purpose) flour and ¾ teaspoon salt, rub in 60 mL (¼ cup) oil or melted ghee, then add water gradually—about 90 mL (6 tablespoons) in total—until the dough is firm, cohesive and pliable, not sticky. Knead just until it holds together, then rest it covered before rolling (25–30 minutes in the cited recipe), checking that it remains workable.
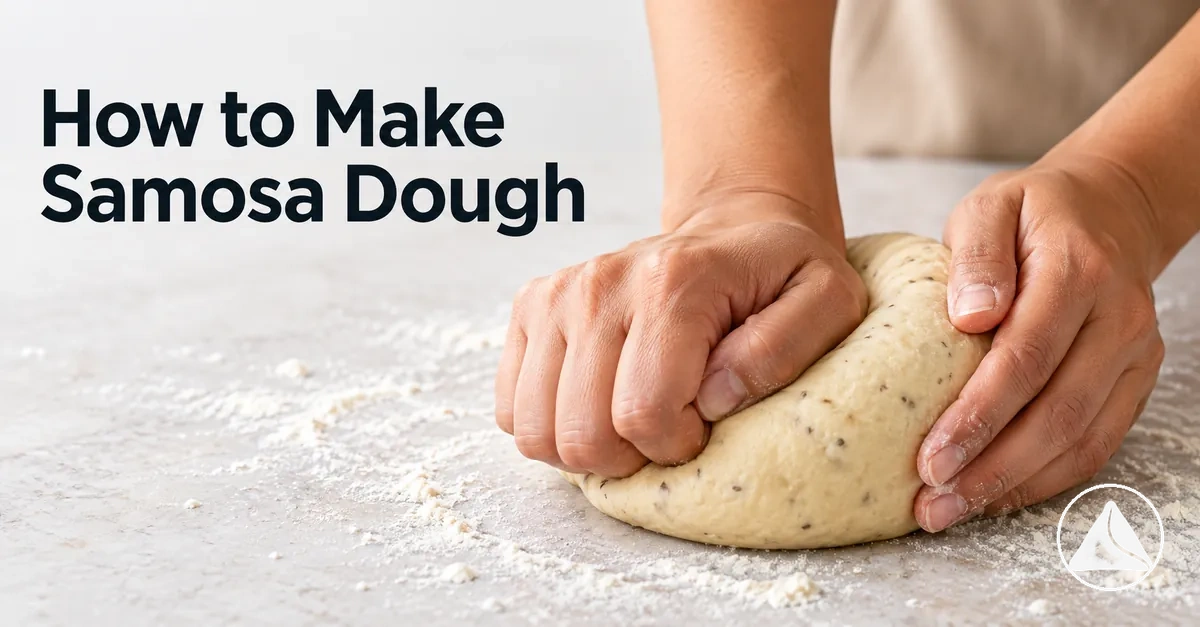
Samosa dough: from ingredients to rolling
Use this batch as a reference, then follow the texture cues through four preparation stages. Water absorption and working time vary with the flour and method.
Example ingredient amounts · based on Swasthi’s Recipes
- Plain flour
- 250 g (2 cups)
- Salt
- ¾ tsp
- Oil or melted ghee
- 60 mL (¼ cup)
- Water
- About 90 mL (6 tbsp)
Start with 60 mL (4 tbsp) of water; add more only as the dough needs it. These quantities describe one recipe, not every samosa dough.
-
Coat the flour
Mix flour and salt, then rub in the fat until the mixture is evenly coated and crumb-like.
Check the crumb stage -
Add water little by little
Mix after each addition. Stop adding water once the dough holds together without becoming soft or sticky.
Check hydration cues -
Knead to firmness
Work until cohesive and workable; avoid unnecessary extra kneading that makes the dough overly elastic.
Know when to stop -
Rest covered, then roll
Rest for the chosen recipe’s duration (25–30 minutes in this example); roll when firm but pliable.
Check resting readiness
Final check: A gentle press meets resistance, the dough keeps its shape, and it bends without crumbling or clinging to your fingers. If it does not, check the dough adjustment guide.
The proportion of fat to flour affects the pastry’s structure, while flour absorption determines how much water to add. Use the listed recipe quantities as a starting point and the dough’s feel to decide when it is ready.
Table of Contents
Ingredients and Proportions for Samosa Dough
Samosa dough is made from four core ingredients: flour, salt, fat (oil or ghee), and water.
Together, these components form a cohesive pastry dough that should be firm enough to hold its shape yet pliable enough for rolling.
Flour, salt, and fat are measured according to the chosen recipe, while the water amount is adjusted to achieve the required dough consistency.
The image shows these ingredients before mixing, and the quantities below follow the base dough proportions from Swasthi's Recipes rather than a universal formula.
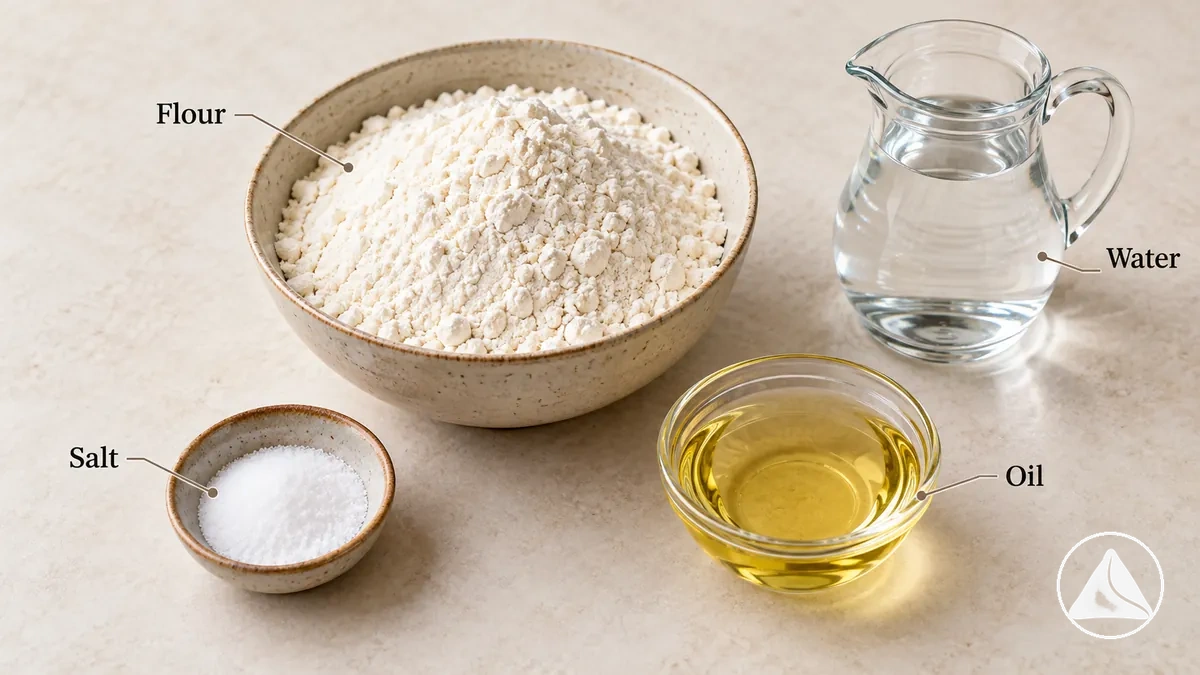
- Flour — 250 g (2 cups) all-purpose flour: Forms the main structure of samosa dough. Its moisture absorption influences how much water is needed to produce a cohesive, workable mixture.
- Salt — ¾ teaspoon: Seasons the dough and distributes flavour throughout the pastry. The measured amount belongs to the example flour quantity and can differ between recipes.
- Fat — 60 mL (¼ cup) oil or melted ghee: Coats the flour and contributes to the pastry's crust structure. Swasthi's Recipes notes that too little fat can produce a hard crust, while excessive fat can cause the pastry to break.
- Water — approximately 90 mL (6 tablespoons): Hydrates the flour and binds the ingredients into a cohesive dough. This is the amount reported for the example batch; the actual quantity should be adjusted according to flour absorption and the required firm, pliable consistency.
The proportion of fat to flour influences the dough's structure, so the fat quantity should remain consistent with the selected recipe rather than being adjusted independently.
Flour and salt provide measured base quantities, while water is the condition-sensitive component because different flours can absorb different amounts of moisture.
Adding more water increases hydration and softens the mixture, whereas insufficient water can leave the flour unable to bind into a cohesive dough.
The final ingredient balance should produce samosa dough that is firm and pliable without becoming excessively soft or sticky.
Oil or Ghee for the Dough
Oil and ghee serve the same basic function in samosa dough: both are fats incorporated into flour to influence the dough's texture and eventual crust structure.
The image compares these two fat options alongside flour, showing their shared role in dough preparation.
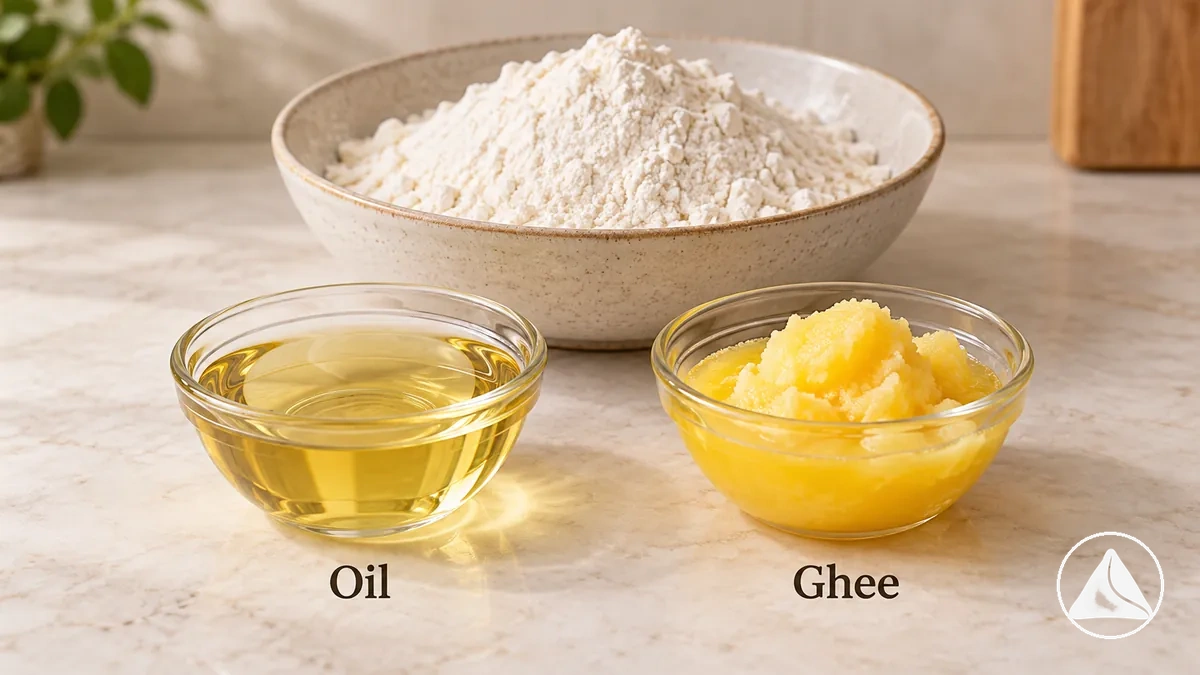
- Neutral oil
- Flavour: Adds little taste of its own.
- Mixing: Liquid oil can be rubbed directly through the flour.
- Ghee
- Flavour: Gives a richer, buttery flavour.
- Mixing: Soften or melt solid ghee so that it coats the flour evenly.
According to Swasthi's Recipes, too little fat can produce a hard crust, while excessive fat can make the pastry fragile and more likely to break.
When substituting oil for ghee or vice versa, follow a recipe that accommodates the chosen fat and check the resulting dough consistency rather than assuming identical handling or crust results.
How Much Water to Add
Add water gradually to the flour-and-fat mixture until the samosa dough becomes firm, cohesive, and pliable rather than soft or sticky.
The amount depends on the flour's moisture absorption and the chosen recipe, so dough consistency is the stopping cue rather than a fixed volume alone.
The image shows staged water addition and the firm, cohesive dough state that signals when to stop.
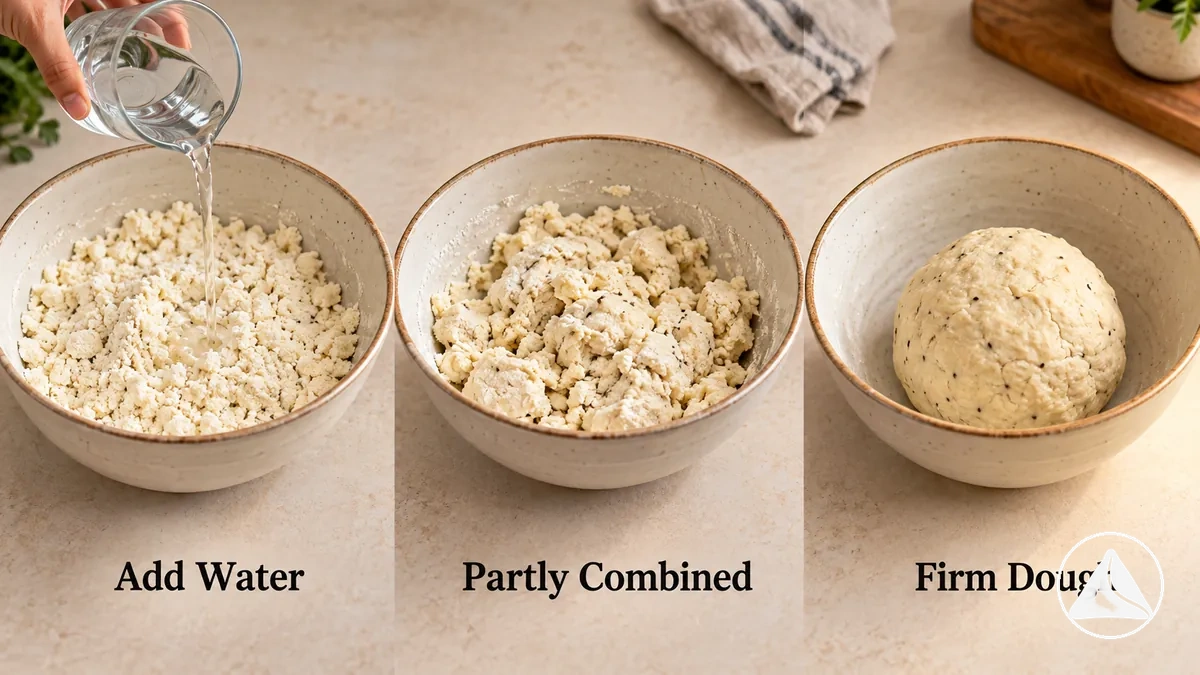
According to Swasthi's Recipes, a dough batch containing 250 g (2 cups) of all-purpose flour begins with 60 mL (4 tablespoons) of water and uses approximately 90 mL (6 tablespoons) in total, adding more as needed.
Each addition increases hydration, but excess water can make samosa dough too soft and sticky.
The following stopping cues distinguish a mixture that still needs water from dough that has reached the required consistency.
- Cohesion: If loose, dry flour still separates from the mixture, add a little more water. The dough should begin holding together as one cohesive mass rather than falling into dry crumbs.
- Firmness: The dough should hold its shape and feel firm when gently pressed while remaining pliable enough to handle. Stop adding water once this state is reached rather than continuing until the mixture becomes soft.
- Workability and non-stickiness: The dough should form a manageable mass without sticking noticeably to the fingers or bowl. Once it is cohesive, firm, and workable, stop adding water even if the full amount suggested by another recipe has not been used.
Mix and Knead the Samosa Dough
Mix samosa dough in a controlled sequence: incorporate fat into the flour first, add water gradually, then knead only as much as the chosen recipe requires.
This order allows fat incorporation before hydration and helps control how the dough develops.
The goal is a cohesive, firm dough texture rather than a soft or excessively elastic mixture.
The image illustrates the preparation sequence, from the crumb-like flour mixture through gradual water addition to lightly kneaded dough.
Follow these three stages in order, using the condition of the mixture to check progress and determine when to stop.
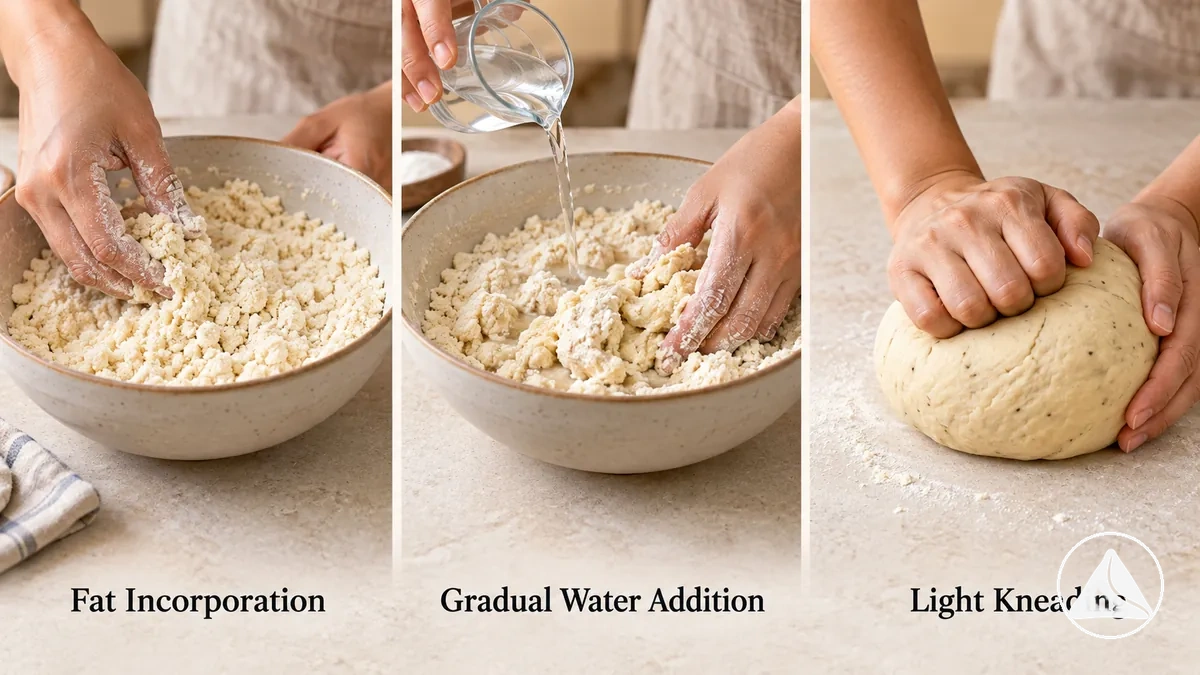
- Incorporate the fat: Mix the measured oil or ghee into the flour until the mixture develops an evenly coated, crumb-like texture. Check that the fat is distributed throughout the flour before introducing water.
- Add water gradually: Add water in small amounts while mixing the ingredients together. Continue only until the flour binds into a cohesive, firm mass that holds together without becoming excessively soft or sticky.
- Knead to the required texture: Work the combined dough according to the chosen recipe, using controlled kneading rather than prolonged kneading by default. Check that the dough is firm yet pliable and holds together as one workable mass. Stop when this texture is reached, following any additional kneading requirements specified by the recipe.
Dough texture provides the final verification that mixing and kneading are complete.
A cohesive dough that holds its shape while remaining workable indicates the intended preparation state for many samosa recipes.
Kneading duration and intensity can differ between methods, so the recipe's target consistency should guide the stopping decision rather than a fixed kneading time.
Work the Fat into the Flour
Add the measured oil or ghee to the flour and rub it through with your fingertips, lifting and mixing the ingredients until the fat is evenly distributed.
Continue rubbing and mixing until the flour looks crumb-like and feels lightly coated rather than dry and powdery.
Check that no pockets of uncoated flour or pooled fat remain before water is introduced.
The image shows the crumb-like texture that indicates the mixture is ready for hydration.
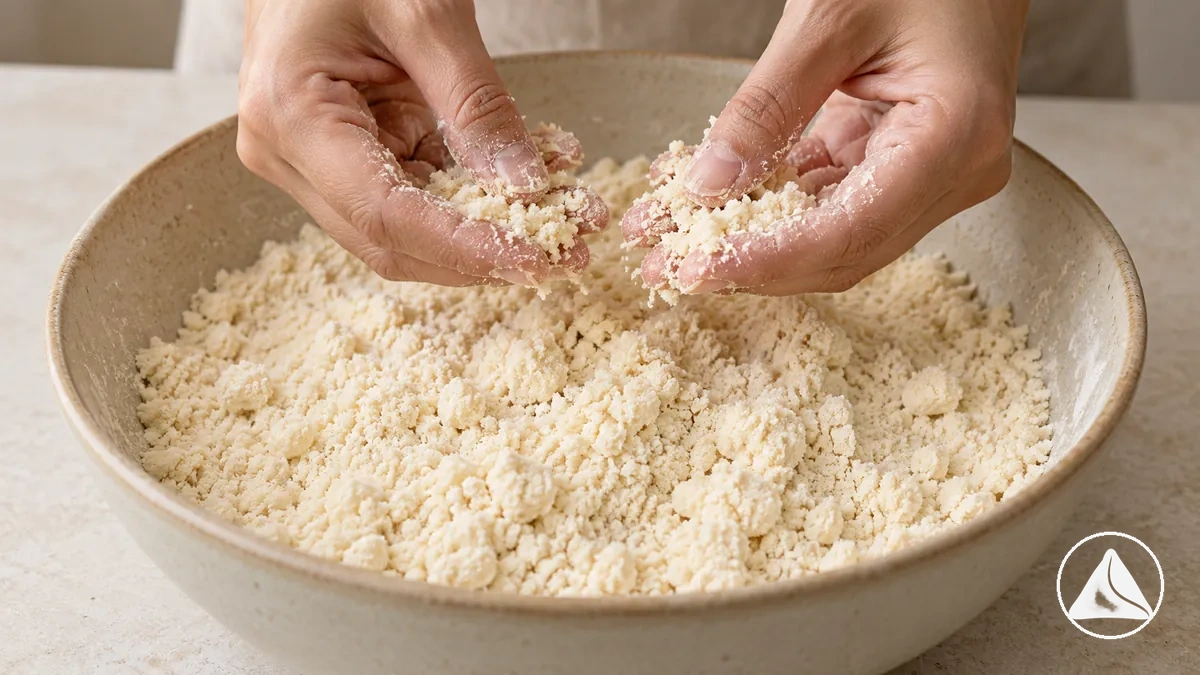
Even flour coating helps distribute the fat throughout the mixture, contributing to a more consistent pastry structure as the dough forms.
The required mixing time depends on the amount of flour, the type of fat, and how thoroughly the ingredients are worked together.
Use the mixture's uniform appearance and texture as the readiness cue rather than relying on a fixed number of minutes.
Add Water Gradually
Add water to the flour-and-fat mixture in small increments, mixing and checking the dough after each addition.
Repeat only if the mixture has not yet reached a firm, cohesive, workable state.
The image illustrates this staged hydration process, showing how gradual water addition leads to the dough texture that signals when to stop.
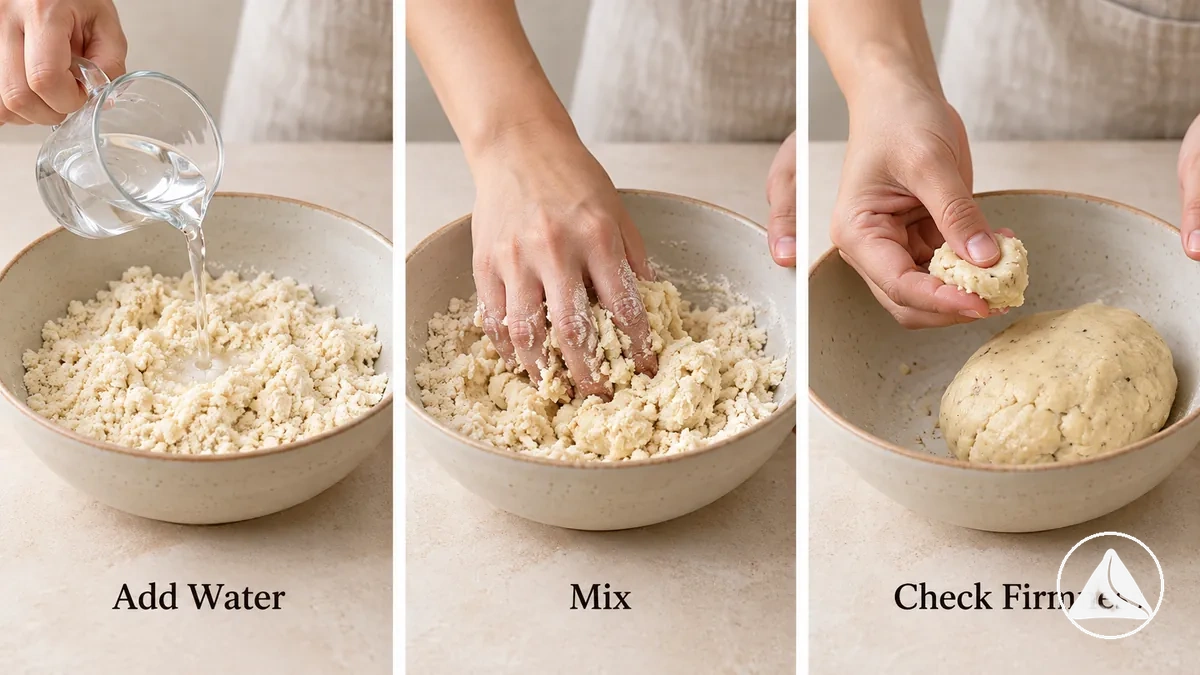
- Add a small amount of water: Pour a little water over the flour-and-fat mixture. Check that the water begins moistening the flour without collecting as excess liquid in the bowl.
- Mix after the addition: Work the water through the mixture so the flour absorbs it evenly. Check whether the mixture remains loose and crumb-like or begins forming connected dough pieces.
- Assess the dough: Gently press the mixture together to check whether it forms a cohesive, firm mass. If dry flour still separates and the mixture cannot hold together, another small addition of water may be needed.
- Repeat or stop: If the dough remains too dry to bind, repeat the small water addition and mixing process, checking the texture again before continuing. Stop adding water once the dough holds together as a firm, workable mass without becoming excessively soft or sticky.
How Long to Knead the Dough
Kneading time for samosa dough depends on the recipe's method, so there is no single minute count that applies to every preparation.
Some methods call for brief kneading to bring the dough together, while others require more working to reach their intended dough state.
Use the recipe's stated kneading duration as a timing reference, but check the dough's cohesion and firmness to determine the actual stop condition.
Excessive kneading can develop more elasticity than intended for some samosa pastry methods and may contribute to a tougher crust, so additional working should serve a defined texture requirement rather than simply extend the kneading time.
The Right Samosa Dough Consistency
The right samosa dough consistency is firm or slightly stiff while remaining pliable enough to handle and roll.
It should hold its shape rather than feel soft like a typical roti or naan dough.
After mixing, the dough's texture is the main verification point for determining whether it is workable and ready for the next preparation stage.
Firmness describes how much resistance the dough offers when gently pressed.
Pliability indicates whether the dough can bend and change shape without falling apart.
Stickiness reveals whether the surface releases cleanly from fingers and the work surface.
Rolling readiness brings these properties together, showing whether the dough can be handled and flattened with sufficient control.
- Firmness: The dough should feel firm or slightly stiff and maintain its shape when gently pressed. A dough mass that feels very soft or spreads easily may contain excess water, making controlled shaping more difficult.
- Pliability: A small portion should bend and compress under gentle pressure without immediately crumbling. Dough that resists all shaping or breaks apart during light handling has not reached a workable state.
- Stickiness: The surface should feel relatively dry and release from the fingers without leaving a sticky coating. Dough that clings noticeably to the hands or work surface may be too soft because of excessive hydration.
- Rolling readiness: The dough should be workable enough to flatten into a controlled pastry sheet without excessive sticking or resistance. This indicates that its firmness and flexibility are suitable for rolling after any resting period required by the recipe.
Correct dough consistency supports controlled handling and can contribute to the structure of the finished pastry, but it does not determine crust crispness on its own.
To keep samosas crispy, other factors, including pastry thickness and cooking conditions, also need consideration.
How Firm the Dough Should Feel
- Thumb press
- Firm or slightly stiff: You feel resistance and leave a shallow dent without the dough spreading or sticking.
- Small-piece bend
- Pliable: A piece keeps its shape but bends a little; it does not crumble or stretch excessively.
- Overly soft feel
- Possible excess hydration: Dough that collapses easily or clings heavily to your fingers may contain too much water.
This tactile firmness helps the dough remain workable during handling and supports controlled rolling after any resting period required by the recipe.
Adjusting Dough That Is Too Dry or Too Soft
Samosa dough that is too dry may crumble or struggle to bind into a cohesive mass, while dough that is too soft may spread or stick excessively during handling.
These symptoms suggest different moisture imbalances: dry dough may be under-hydrated, whereas overly soft dough may be over-hydrated.
Before making a correction, check how the dough responds to gentle pressure rather than relying on appearance alone.
The diagnostic table distinguishes each symptom, its likely issue, a practical check, and an incremental corrective direction.
| Dough state | Likely issue | Check | Incremental correction |
|---|---|---|---|
| Too dry: The mixture remains crumbly or is difficult to bind. | Possible under-hydration or uneven moisture distribution. | Press a small portion together. If it separates into dry pieces rather than holding as a cohesive mass, additional moisture may be needed. | Mix the dough thoroughly to distribute existing moisture. If it still does not bind, add a small amount of water, work it through, and recheck before adding more. |
| Too soft: The dough feels excessively soft, sticky, or difficult to handle. | Possible over-hydration from excess water. | Gently press and lift a small portion. If it spreads easily or clings heavily to the fingers instead of maintaining its shape, the dough may contain too much moisture. | Work in a small amount of flour to absorb some excess moisture, then recheck firmness and stickiness. Repeat cautiously only if the dough remains too soft. |
Make one small adjustment at a time, then recheck the dough before deciding whether another correction is necessary.
Stop adjusting when the mixture reaches the intended firm yet workable state, because repeated additions can shift the dough toward the opposite texture problem.
Dryness may contribute to cracking, but it is only one possible factor, so cracks alone do not establish that the dough is under-hydrated.
The immediate goal is to correct the observed moisture imbalance without overshooting the target firmness.
Rest the Dough Before Rolling
Rest the samosa dough after mixing and kneading, before rolling it into pastry sheets.
This resting period is the final preparation stage before shaping and helps make the dough easier to handle.
Keep the dough covered while it rests to limit surface drying.
The aim is to improve workability so the dough can be rolled with greater control.
Follow the resting condition specified by the chosen recipe before proceeding to rolling.
Once the required rest is complete, check that the dough remains firm and cohesive but is pliable enough to handle without excessive resistance.
Readiness depends on both completing the intended resting period and reaching a workable dough state, which may vary between methods.
Proceed to rolling when the selected rest condition has been met and the dough is manageable for shaping.
Why Resting the Dough Matters
After kneading
Gluten gives the dough structure and elasticity, which can make freshly worked pastry resist stretching.
During the rest
The gluten structure relaxes, reducing some of that resistance.
When rolling
The dough may spring back less and become easier to flatten into pastry sheets.
The degree of gluten relaxation and the resulting handling improvement depend on the dough structure and how it was worked before resting.
Resting can make a properly prepared dough easier to roll, but it does not replace the need for suitable firmness and cohesion.
Its primary benefit at this stage is improved shaping readiness rather than a guaranteed change in the finished crust.
How Long to Rest the Dough
- Example time
- 25–30 minutes for the firm, covered dough in Swasthi’s Recipes; other recipes may differ.
- Check afterwards
- The dough should remain firm and cohesive while feeling easier to handle and roll.
- If it springs back
- Allowing a little more rest may help, depending on the method and the dough’s condition.
- Decision rule
- Use the recipe’s duration as a timing reference and the dough’s workability as the practical check.
Rest times from different recipes should not be averaged into one recommendation because their dough formulations and preparation methods may differ.
Keep the Dough Covered While It Rests
Keep samosa dough covered throughout its rest so the exposed dough surface does not dry out before rolling.
A clean, lightly damp cloth or a covered container can help protect the dough from moisture loss.
Either option is suitable when it keeps the surface protected during the resting period.
Covering the dough limits surface drying and helps retain the moisture needed for a pliable outer layer.
Once the resting period is complete, uncover the dough and check that its surface remains supple rather than dry or crusted, supporting rolling readiness.
When the dough is ready to handle, proceed to rolling before you fold and seal the pastry during shaping.